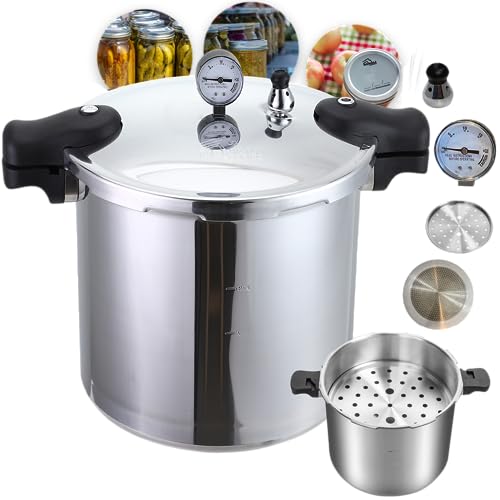
Introduction: Unveiling the Power of Deep Cleaning
Your pressure cooker is a kitchen powerhouse, churning out delicious meals with remarkable speed and efficiency. Yet, like any culinary workhorse, it demands proper care to maintain its prowess. While a quick rinse after each use is essential, deep cleaning takes your pressure cooker's maintenance to the next level, ensuring optimal performance, longevity, and, most importantly, your safety.
Why Deep Cleaning Is Essential
Hygiene and Food Safety
Over time, food particles, grease, and residue can accumulate in the nooks and crannies of your pressure cooker. These hidden deposits can harbor bacteria and other harmful microorganisms, posing a risk to your health. Deep cleaning eliminates these contaminants, creating a hygienic environment for your culinary creations.
Maintaining Performance and Longevity
A buildup of grime can impede your pressure cooker's performance. Clogged valves, vents, and seals can hinder pressure regulation, leading to longer cooking times or, worse, safety hazards. Regular deep cleaning ensures that all components function optimally, extending the lifespan of your appliance.
Preventing Buildup and Damage
Certain food residues, especially those high in starch or sugar, can harden and become difficult to remove over time. This buildup can not only affect the cooker's appearance but also lead to corrosion or damage to delicate parts. Deep cleaning prevents this buildup, preserving the pristine condition of your pressure cooker.
When To Deep Clean Your Pressure Cooker
Frequency Based on Usage
The frequency of deep cleaning depends on how often you use your pressure cooker. If you're a frequent user, deep cleaning every 1-2 months is recommended. For occasional users, every 3-4 months should suffice. However, always consult your pressure cooker's manual for specific recommendations from the manufacturer.
Signs Your Cooker Needs Attention
Beyond a regular schedule, certain signs indicate your pressure cooker needs a deep clean:
Lingering odors: If your cooker retains food smells even after washing, it's time for a deep clean.
Visible buildup: Check the sealing ring, valve, and other parts for visible grime or discoloration.
Difficulty sealing: If the lid doesn't seal properly or steam leaks, it may indicate a need for cleaning.
Reduced performance: Longer cooking times or inconsistent pressure buildup can signal a dirty cooker.
Tools and Materials You'll Need
Common Household Items
Most deep cleaning tasks can be accomplished with items you likely already have at home:
Dish soap: Choose a mild dish soap suitable for your pressure cooker's material.
Warm water: Use warm water for most cleaning tasks, as hot water can damage some materials.
Soft sponges or cloths: Avoid abrasive scrubbers that can scratch the surface.
Non-metallic brushes: These are helpful for cleaning crevices and hard-to-reach areas.
Baking soda: A natural cleaner and deodorizer for tackling tough stains and odors.
Vinegar: A versatile natural cleaner for descaling and removing mineral deposits.
Lemon juice: A natural disinfectant and deodorizer for a fresh scent.
Optional Specialty Cleaners
Depending on your pressure cooker's material and the extent of cleaning needed, you might consider these additional options:
Stainless steel cleaner: For polishing and removing stains from stainless steel surfaces.
Descaling solution: For dissolving mineral buildup in areas with hard water.
Commercial pressure cooker cleaner: Follow manufacturer instructions carefully if using.
By assembling these tools and understanding the signs that indicate a deep clean is necessary, you're well on your way to revitalizing your pressure cooker and ensuring its optimal performance.
Preparing Your Pressure Cooker For Deep Cleaning
Before diving into the deep cleaning process, taking the proper preparatory steps is crucial for safety and efficiency. These steps will ensure a smooth and effective cleaning session, preventing any mishaps and protecting your appliance.
Unplug and Cool Down (Electric Cookers)
If you own an electric pressure cooker, the first and most important step is to unplug it from the power source. This eliminates any risk of electrical shock during the cleaning process. Allow the cooker to cool down completely before proceeding. Depending on the model and the amount of heat generated during the last use, this can take anywhere from 15 minutes to an hour.
Release Pressure Safely (Stovetop Cookers)
For stovetop pressure cookers, ensuring all pressure is released is paramount before disassembling. Never attempt to force open the lid while pressure is still present, as this can be extremely dangerous. Follow your pressure cooker's instructions for safe pressure release. Most models have a quick-release option, but it's generally safer to allow the pressure to release naturally.
Disassemble All Removable Parts
Once the cooker is cool and depressurized, carefully disassemble all removable parts. This includes the lid, sealing ring, pressure release valve, steam vent/float valve, and any other accessories like the steam rack or trivet. Refer to your pressure cooker's manual for specific instructions on how to disassemble these parts correctly.
Soak Removable Parts (If Needed)
If you notice any stubborn grime or buildup on the removable parts, you can soak them in warm soapy water for 15-20 minutes. This will help loosen the debris and make it easier to clean later. For tougher stains or mineral deposits, consider soaking the parts in a vinegar solution (equal parts water and vinegar). However, avoid soaking parts with electronic components, such as the pressure release valve of some electric cookers.
By following these preparatory steps, you ensure a safe and organized deep cleaning process. Disassembling the cooker allows you to access all the nooks and crannies, while soaking helps loosen stubborn grime and simplifies the cleaning process. With your pressure cooker prepped, you're ready to move on to the next stage of deep cleaning.
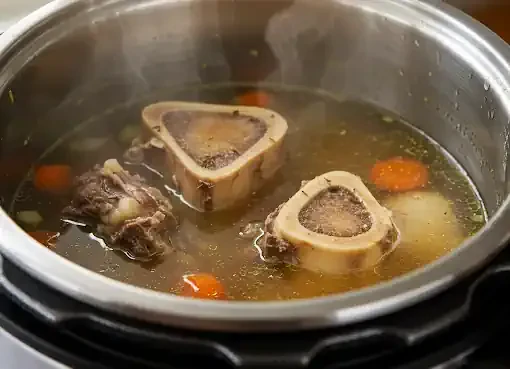
Deep Cleaning The Inner Pot: Restoring Shine and Hygiene
The inner pot, the heart of your pressure cooker, bears the brunt of cooking adventures. It's where flavors mingle, ingredients transform, and, unfortunately, where stubborn residues and stains can accumulate. Deep cleaning the inner pot restores its luster and ensures a hygienic cooking environment.
Tackling Stuck-On Food and Burnt Residue
Even the most diligent daily cleaning can't always prevent the occasional burnt-on food or stubborn residue. These unsightly blemishes can affect the taste of your dishes and harbor bacteria. Here's how to conquer them:
Baking Soda Paste Method:
Baking soda is a gentle abrasive and natural deodorizer. Create a paste by mixing baking soda with water and apply it to the affected areas. Let it sit for 30 minutes to an hour, then gently scrub with a non-abrasive sponge or cloth. The baking soda will help lift the burnt-on food, making it easier to remove.
Vinegar Soak Method:
Vinegar's acidity works wonders on burnt-on food. Fill the inner pot with a solution of equal parts water and vinegar. Let it soak for several hours or overnight. The vinegar will loosen the residue, allowing you to easily scrub it away.
Boiling Water and Lemon Method:
This method combines the cleaning power of boiling water with the natural acidity and degreasing properties of lemon. Fill the inner pot with water and add a few slices of lemon. Bring the mixture to a boil and let it simmer for 15-20 minutes. The combination of heat and lemon juice will help loosen and lift the burnt-on food.
Removing Discoloration and Stains
Over time, your pressure cooker's inner pot might develop discoloration or stains, especially if you have hard water or frequently cook acidic foods. Here's how to address this issue:
Stainless Steel Cleaning Techniques:
For stainless steel inner pots, you can use a stainless steel cleaner or a paste of baking soda and water to remove discoloration. Apply the cleaner or paste to the affected areas, let it sit for a few minutes, then gently scrub with a non-abrasive pad. Rinse thoroughly and dry.
Aluminum Cleaning Techniques:
Aluminum inner pots require a gentler approach. Avoid using harsh abrasives or acidic cleaners, as they can damage the surface. Instead, try boiling a mixture of water, vinegar, and apple peels in the pot. The acid in the vinegar and apples will help remove discoloration without harming the aluminum.
Preventing Future Discoloration:
To prevent future discoloration, avoid using abrasive cleaners or steel wool on your inner pot. Dry the pot thoroughly after washing to prevent water spots. If you have hard water, consider using filtered or distilled water for cooking.
Deodorizing Your Inner Pot
Unpleasant odors can linger in your pressure cooker, even after washing. These odors can transfer to your food and affect its taste. Here's how to eliminate them:
Baking Soda Absorption:
Sprinkle a generous amount of baking soda on the bottom of the inner pot. Let it sit overnight to absorb any lingering odors. Then, wash the pot as usual.
Lemon Juice Boil:
Fill the inner pot with water and add the juice of one lemon. Boil the mixture for a few minutes, then let it cool and wash as usual. The citric acid in lemon juice helps neutralize odors.
Activated Charcoal:
Activated charcoal is known for its ability to absorb odors. Place a few pieces of activated charcoal in the pot and leave it overnight. The charcoal will draw out any unpleasant smells, leaving your inner pot fresh and odor-free.
By tackling stuck-on food, discoloration, and odors, you can restore your pressure cooker's inner pot to its pristine condition, ensuring hygienic and flavorful cooking experiences.
Deep Cleaning The Lid and Sealing Ring: A Vital Partnership for Safety
The lid and sealing ring are the dynamic duo of your pressure cooker, working together to create an airtight seal that ensures safe and efficient cooking. Deep cleaning these components is crucial for maintaining their integrity and preventing leaks or malfunctions.
Inspecting for Damage or Wear
Before diving into the cleaning process, take a moment to carefully inspect both the lid and sealing ring for any signs of damage or wear. Look for cracks, tears, or any deformation that could compromise their ability to form a tight seal. If you notice any damage, it's essential to replace these parts immediately to avoid potential safety hazards.
Cleaning the Sealing Ring
The sealing ring, typically made of silicone or rubber, is a magnet for food particles, grease, and odors. Thoroughly cleaning it is essential for preventing leaks and ensuring a proper seal.
Hand Washing Tips:
Gently remove the sealing ring from the lid and wash it with warm soapy water. Use a soft brush or toothbrush to scrub away any debris that might be lodged in the crevices. Rinse thoroughly and let it air dry completely before reattaching it to the lid.
Dishwasher Safety:
Some sealing rings are dishwasher-safe, but it's always best to check your pressure cooker's manual for specific instructions. If dishwasher safe, place the sealing ring on the top rack for cleaning.
Cleaning the Lid
The lid itself can accumulate spills, splatters, and grime, especially around the rim where it comes in contact with the sealing ring. Cleaning the lid ensures that it remains hygienic and functions properly.
Soaking in Soapy Water:
Fill a sink or basin with warm soapy water and submerge the lid. Let it soak for 15-20 minutes to loosen any stubborn grime. Then, scrub the lid gently with a soft sponge or cloth, paying special attention to the rim and any crevices. Rinse thoroughly and dry.
Cleaning Crevices and Hard-to-Reach Areas:
Use a non-metallic brush or an old toothbrush to reach into the crevices and edges of the lid, where debris can easily accumulate. Gently scrub away any grime, then rinse and dry thoroughly.
Ensuring a Proper Seal Upon Reassembly
After cleaning the lid and sealing ring, reassemble them carefully according to your pressure cooker's instructions. Ensure that the sealing ring is correctly positioned and securely seated in its groove. A properly installed sealing ring will create an airtight seal, preventing leaks and ensuring safe pressure cooking.
By diligently cleaning and maintaining your pressure cooker's lid and sealing ring, you not only ensure its longevity but also prioritize your safety in the kitchen. A clean and well-maintained sealing system is essential for a worry-free cooking experience.
Cleaning the Pressure Release Valve and Other Small Parts: Ensuring Safety and Functionality
The pressure release valve and other seemingly minor components of your pressure cooker play a crucial role in its overall safety and performance. These parts are responsible for regulating pressure, venting steam, and preventing blockages. Deep cleaning them ensures that your pressure cooker operates smoothly and safely.
Disassembling the Valve
The pressure release valve is the most critical component for pressure regulation. To clean it effectively, you need to disassemble it according to your pressure cooker model's instructions. Generally, this involves removing the valve cap, spring, and any other removable parts. Refer to your user manual for specific guidance.
Cleaning Methods
Soapy Water and Brush:
For regular cleaning, warm soapy water and a small brush, such as a toothbrush or pipe cleaner, are sufficient. Gently scrub all the valve parts, paying attention to crevices and holes where food particles or debris might be lodged. Rinse thoroughly with clean water and let it dry completely before reassembling.
Vinegar Soak for Mineral Buildup:
If you notice mineral buildup or hard water deposits on the valve parts, soak them in a vinegar solution (equal parts water and vinegar) for a few hours. The acidity of the vinegar helps dissolve mineral deposits, making them easier to remove. After soaking, scrub with a brush, rinse, and dry.
Cleaning the Steam Vent/Float Valve
The steam vent or float valve is another important component that releases excess pressure during cooking. It can sometimes get clogged with food particles or residue. To clean it, gently remove it from the lid (if possible) and wash it with warm soapy water. Use a small brush or toothpick to clear any blockages in the vent hole. Rinse thoroughly and let it dry before reattaching it to the lid.
Cleaning Other Accessories (Steam Rack, Trivet)
Don't forget about other accessories that come with your pressure cooker, such as the steam rack or trivet. These can also accumulate food residue and stains. Wash them with warm soapy water and a soft sponge or brush. If necessary, soak them in a baking soda solution or a vinegar solution to remove stubborn stains or odors.
Reassembling the Valve and Parts
After cleaning and thoroughly drying all the components, reassemble the pressure release valve and other parts according to your pressure cooker's instructions. Ensure all parts are properly aligned and securely fastened. A properly functioning pressure release valve is crucial for maintaining safe pressure levels during cooking.
By dedicating time to clean these smaller yet essential components, you ensure that your pressure cooker operates safely and efficiently, allowing you to cook with confidence and peace of mind.
Tackling Special Cleaning Challenges: Conquering Stubborn Stains and Odors
Even with diligent cleaning, certain stubborn stains and odors may linger in your pressure cooker. Hard water can leave mineral deposits, while certain foods might leave behind persistent odors. Fear not, for these challenges can be overcome with a few targeted cleaning techniques.
Removing Mineral Deposits (Limescale)
Hard water, rich in minerals like calcium and magnesium, can leave behind a white, chalky residue known as limescale. Limescale buildup can affect your pressure cooker's performance and create an unsightly appearance.
Vinegar Solution:
Vinegar's acidity is a powerful weapon against limescale. Fill the inner pot with a solution of equal parts water and vinegar. Bring the mixture to a boil, then let it simmer for 15-20 minutes. The vinegar will help dissolve the mineral deposits. After cooling, scrub gently with a non-abrasive pad and rinse thoroughly.
Lemon Juice:
Similar to vinegar, lemon juice's acidity can also help break down limescale. Fill the inner pot with water and add the juice of one or two lemons. Boil the mixture for a few minutes, then let it cool. Scrub gently and rinse to remove any loosened deposits.
Commercial Descaler:
If natural solutions prove ineffective, you can use a commercial descaling solution specifically designed for kitchen appliances. Follow the manufacturer's instructions carefully for safe and effective use.
Eliminating Stubborn Odors
Certain foods, like fish or garlic, can leave behind lingering odors in your pressure cooker. These odors can permeate the sealing ring and other parts, affecting the taste of future dishes. Here's how to banish those stubborn smells:
Baking Soda and Water Paste:
Create a paste by mixing baking soda with water and apply it to the interior of the pressure cooker, including the lid and sealing ring. Let it sit for several hours or overnight. The baking soda will absorb the odors, leaving your cooker smelling fresh.
Lemon and Water Boil:
Fill the inner pot with water and add a few lemon slices. Bring the mixture to a boil and let it simmer for 15-20 minutes. The steam and citric acid from the lemon will help neutralize odors.
Commercial Odor Eliminators:
If natural solutions don't completely eliminate the odors, you can try commercial odor eliminators designed for kitchen appliances. These products often contain activated charcoal or other odor-absorbing ingredients.
By addressing these special cleaning challenges, you can restore your pressure cooker to its pristine condition, ensuring it remains odor-free and functions optimally. Remember, regular maintenance and deep cleaning are key to preserving the performance and longevity of your valuable kitchen appliance.
Deep Cleaning Electric Pressure Cooker Components: A Modern Approach
Electric pressure cookers have revolutionized the way we cook, offering convenience and versatility with the touch of a button. However, their unique components require specific cleaning attention to ensure continued performance and longevity.
Cleaning the Heating Element
The heating element is the heart of your electric pressure cooker, responsible for generating the heat needed for cooking. While it doesn't come into direct contact with food, it can accumulate splatters and spills over time. To clean it:
Unplug and Cool Down: Always unplug your electric pressure cooker and allow it to cool completely before cleaning any electrical components.
Wipe with Damp Cloth: Use a damp cloth to gently wipe the heating element. Avoid using excessive water or submerging the element, as this can damage it.
Inspect for Damage: Check for any signs of damage, such as cracks or corrosion. If you notice any issues, consult the manufacturer or a qualified technician for repair.
Cleaning the Control Panel
The control panel is the brain of your electric pressure cooker, housing the buttons, display, and other electronic controls. Keep it clean to ensure smooth operation and prevent malfunction.
Damp Cloth and Mild Cleaner: Use a slightly damp cloth and a mild cleaning solution (like a mixture of water and dish soap) to wipe the control panel. Avoid using abrasive cleaners or excessive moisture.
Prevent Moisture Damage: Never spray liquid directly onto the control panel. Instead, apply the cleaning solution to the cloth and then wipe the panel gently.
Dry Thoroughly: After cleaning, ensure the control panel is completely dry before plugging the cooker back in.
Cleaning the Exterior Casing
The exterior casing of your electric pressure cooker can accumulate dust, fingerprints, and food splatters. Regular cleaning keeps it looking its best and prevents the buildup of grime.
Damp Cloth and Mild Cleaner: Use a damp cloth and a mild cleaning solution to wipe down the exterior casing.
Stainless Steel Care: If your cooker has a stainless steel exterior, you can use a stainless steel cleaner to remove fingerprints and smudges.
Avoid Abrasives: Don't use abrasive cleaners or scouring pads, as they can scratch the surface.
Additional Tips for Electric Models
Consult the Manual: Always refer to your pressure cooker's manual for specific cleaning instructions for your model.
Check the Sealing Ring: Electric pressure cookers often have a silicone sealing ring that can trap food particles and odors. Remove and clean the sealing ring regularly according to the manufacturer's instructions.
Clean the Inner Lid: Some electric pressure cookers have a removable inner lid that should be washed separately.
Descale Regularly: If you have hard water, descale your electric pressure cooker regularly to prevent mineral buildup.
By taking the time to deep clean the various components of your electric pressure cooker, you can ensure its continued performance and extend its lifespan. Remember, a clean cooker not only looks good but also ensures safe and efficient cooking for all your culinary adventures.
Maintaining Your Pressure Cooker for Longevity: Proactive Care for Peak Performance
Deep cleaning is a vital aspect of pressure cooker maintenance, but it's just one piece of the puzzle. A holistic approach to care ensures that your appliance remains a reliable and efficient kitchen companion for years to come.
Regular Cleaning Schedule
Establishing a regular cleaning schedule is key to preventing the buildup of grime and ensuring optimal hygiene. While the frequency of deep cleaning might vary depending on usage, daily maintenance after each use is non-negotiable. This includes washing the inner pot, lid, and sealing ring with warm soapy water, and wiping down the exterior. By incorporating this routine into your kitchen habits, you'll minimize the effort required for deep cleaning sessions and maintain a consistently clean cooking environment.
Proper Storage Techniques
How you store your pressure cooker when not in use can significantly impact its longevity.
Dry Thoroughly: Always ensure all parts are completely dry before storing them. Moisture can lead to rust, mold, or bacterial growth.
Store Open: Avoid storing your pressure cooker with the lid on, as this can trap moisture and create a breeding ground for bacteria. Store the lid separately or upside down on the pot to allow air circulation.
Cool, Dry Place: Choose a cool, dry storage location away from direct sunlight or heat sources.
Using the Right Cleaning Products
Not all cleaning products are created equal, and some can be harsh on your pressure cooker's materials. Avoid abrasive cleaners, steel wool, or harsh chemicals that can scratch or damage the surface. Stick to mild dish soap, baking soda, vinegar, and other natural cleaners recommended in this guide. If you opt for commercial cleaners, choose those specifically designed for pressure cookers and follow the manufacturer's instructions carefully.
Avoiding Harsh Chemicals and Abrasives
Harsh chemicals and abrasive cleaners can damage the delicate components of your pressure cooker, such as the sealing ring and pressure release valve. They can also leave behind residue that can affect the taste of your food. Always opt for gentle cleaning methods and avoid using bleach, ammonia, or other harsh chemicals.
Troubleshooting Common Issues
Even with meticulous care, your pressure cooker might experience some common issues over time. Here's how to troubleshoot a few of them:
Food stuck to the bottom: If food gets stuck to the bottom of the inner pot, try soaking it in warm soapy water or a baking soda solution before scrubbing.
Sealing ring leaks: If the sealing ring is leaking, check for any damage or debris. If it's clean and undamaged, try applying a thin layer of cooking oil to help it create a better seal.
Pressure release valve stuck: If the pressure release valve is stuck, try cleaning it with a vinegar solution or a toothpick to remove any blockages.
By following these maintenance tips and troubleshooting common issues, you can ensure your pressure cooker remains a reliable and efficient kitchen companion, ready to tackle any culinary challenge you throw its way.
Summary
This comprehensive guide provides step-by-step instructions on deep cleaning your pressure cooker for optimal performance, hygiene, and longevity. Learn how to tackle stubborn food residue, discoloration, and odors in your inner pot, as well as how to maintain the lid, sealing ring, pressure release valve, and other essential components. Whether you own a stainless steel, aluminum, electric, or stovetop pressure cooker, this guide offers tailored cleaning techniques and natural solutions to address specific challenges like mineral deposits and lingering smells. By following these expert tips and establishing a regular cleaning routine, you can ensure your pressure cooker remains a safe and reliable kitchen companion for years to come.